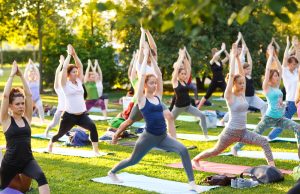
 Practicing mindfulness activities, such as yoga, can be a great and effective way to relieve back pain. Sciatica is a condition that generally targets the lower back and region of your body with heavy pains. However, practicing yoga may help you reduce your levels of pain while discovering a calming activity you love. Continue reading to learn about the nine poses for sciatica relief and prevention.
Sciatica pain is a rather common occurrence. Yoga teachers, you often meet students in their classes who are recovering from a case of sciatica.
So, how can yoga help people who have sciatica?
People suffering from sciatica pain and people who have other back pain issues find it difficult to perform many daily activities. This affects their quality of life and discourages them from pursuing those activities that they could actually do.
Millions of people across the world suffer from sciatica pain. Sadly, most of them live with the pain without knowing about the benefits that are available through yoga. For yoga teachers, it can be a really powerful experience to take the benefits of yoga to all those who need it but remain unaware of it.
A gentle yoga practice can be of great help in reducing sciatic pain. Yoga asanas, along with conscious, slow breaths, can provide immense relief to back pain patients and people who have sciatica. It gives them the right support to take care of their pain and prevent serious complications. Of course, yoga is not a replacement for physical therapy or a medical practitioner’s advice. However, using the specific asanas in the right sequence and with due consideration to an individual’s medical diagnosis does work.
Getting to Know Sciatica
Sciatic nerve pain has been a significant concern for people in the medical community for a long time. Since the earliest days, there has been an attempt to understand the sciatica symptoms and the causes behind this condition.
Historically, there has been a lot of research on sciatic nerve pain and the reasons behind its occurrence. We can find references of sciatic pain from as early as 2nd Century AH in traditional Iranian medicine books. From those early days until well into the 20th century, these traditional views influenced how sciatica was diagnosed. The ancient medical practitioners saw sciatic pain as a problem of the ‘vein’ and not the sciatic nerve itself. And the cause was seen as an excess of any of the 4 types of humor or body fluids: black bile, yellow bile, phlegm, and blood. [1]
In 1934, there was a shift in this traditional view of sciatica. William Jason Mixter and Joseph S. Barr introduced the fundamental relation between the intervertebral disc and sciatica in their article. Published in the New England Journal of Medicine, this landmark report changed how the world saw sciatic pain and its clinical evaluation. [2]
What is Sciatica Nerve Pain?
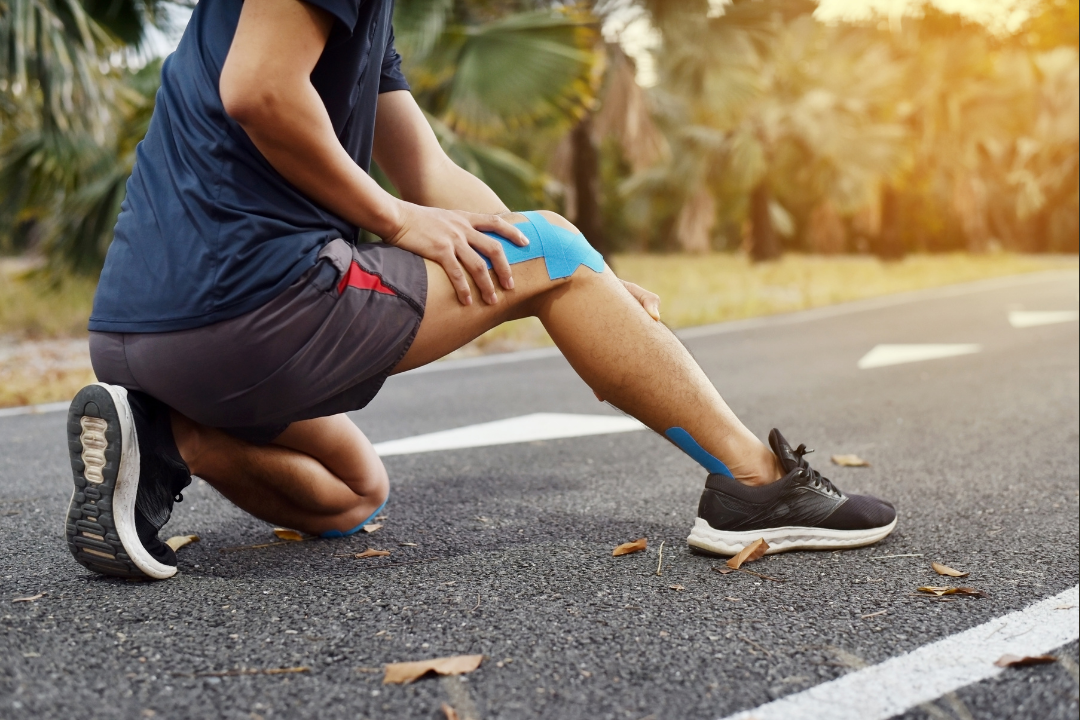
Sciatica is radiating pain in the buttock and leg that occurs due to the irritation or compression of the root of the largest nerve in the body called sciatic nerve. The sciatic nerve starts its journey from the lower back and moves down the legs providing sensation to them.
When the sciatic nerve root is compressed due to changes in the lower back, such as a slipped disc, herniated disc, or other weaknesses of the back, it results in severe pain in the buttock and legs. In many cases, pain is so severe that a person cannot even walk. Mostly the pain is on the one side, though bilateral sciatica is also possible. Treatment of sciatica will depend on its causes.
Common Symptoms of Sciatica
Pain, weakness, and numbness or tingling sensation are the most common symptoms of sciatic nerve pain. The pain may either be constant, or it can be an irregular pain like a spasm. Usually, people with sciatica have the following symptoms:
- Pain in the lower back region
- A heavy feeling in the legs
- A constant, dull pain in the hips, back, and buttocks
- Burning or tingling sensation in the legs, toes, and feet
- Pain that gets worse when moving or changing posture
- Numbness or weakness in the legs and feet. In extreme cases, people may experience a loss of movement in the region.
Sometimes sciatica may result in a rare condition known as ‘cauda equina syndrome,’ and in such cases, the symptoms will also include the inability to control the bladder or bowels. [3]
Common Causes of Sciatica Pain
Sciatica may be caused by various factors. These mainly include:
- Disc Herniation
- Spinal Stenosis
- Spondylolisthesis
- Degenerative Disc Disease
- Obesity, Accident, and Injury
- Piriformis Syndrome
The most common cause for sciatica is the herniation of lumbar discs (disc-shaped cartridges in the lower spine). These discs get herniated due to stress, trauma, or disease; 85% of cases of sciatica are due to spinal disc disorders. [4]
Spinal stenosis usually occurs in the neck and lower back area. It is a condition in which the spinal canal becomes narrow. This puts pressure on the spinal cord and other spinal nerve roots branching out from the vertebrae. When these nerves get compressed and irritated, it leads to back pain and sciatica. Usually, this condition develops over time, and for a long time, one does not notice any visible symptom. [5]
Spondylolisthesis is a condition in which one vertebra extends forward by slipping over the vertebra below it. This can pinch the nerves in the spine and subsequently lead to sciatic pain.
The spinal discs are located between the vertebrae, and they work to soften the impact of movement upon the spine. These spinal discs are composed of cartilages which tend to gradually wear out as we age. This is known as degenerative disc disease, and when this happens, the discs become more prone to herniation. This often becomes another notable cause of sciatica in certain situations.
Sciatica can also occur due to obesity, accident, and other related injuries that directly affect the sciatic nerve.
A less common cause of sciatica is piriformis syndrome. This is a condition characterized by a spasm of the small muscles below the larger muscles of the buttocks called the piriformis muscle. Spasms of the piriformis muscle can irritate or compress the sciatic nerve. Piriformis syndrome is the second most common cause of sciatica. And it is often the cause behind difficult-to-diagnose lower back pain. [6]
Diagnosis and Treatment
In most cases, a medical history of radiating pain is enough for a doctor to make a diagnosis. A physical examination along with certain maneuvers may help confirm the condition. Nonetheless, the doctor may ask for imaging tests like X-ray, CT scan, or MRI to confirm the diagnosis and understand its causes.
Fortunately, most sciatica pains will subside within two to 12 weeks, though in smaller numbers, it may continue for longer. Rest is recommended in the initial period only. For most people, treatment will include pain management with the help of medications and physiotherapy. Few cases with severe spinal deformation may require surgical correction.
Physiotherapy is an essential part of the treatment, and it includes massage, manual therapy, and exercise therapy. Physiotherapy tries to correct the alignment of the spine, strengthen the local muscles and release excessive tension in the piriformis muscle.
Without exercise therapy, sciatica may repeat itself as issues in the lower back or the piriformis. Choice of physical therapy in sciatica is critical, as physical training with brisk movements or high impact may do more harm than good.
Yoga for Sciatica Relief
Yoga is ideally suited for those with chronic low back issues and sciatic pain. It does not involve brisk movements, nor are there any high-impact motions. It primarily consists of stretching and strengthening of muscles progressively.
Doing specific yoga asanas like backbends, forward bend postures, and gentle seated poses helps to keep the spine healthy and flexible. Yoga poses that involve stretching of the hip flexors, the hamstrings, and the glutes are especially useful for lower back pain and sciatica. However, in the later stages, when the pain has subsided, it becomes necessary to strengthen the other supportive muscles. This includes the muscles of the pelvis, the abdomen, and the back muscles.
Before starting yoga, it is essential to consult a physician. During the acute phase or in case of severe herniation, it may be better to rest. Generally, rest is recommended in the acute phase as it helps to reduce inflammation and minimize any further damage. However, once the acute phase is over, yoga can help accelerate the healing process and prevent future sciatica pain. It corrects the spinal alignment, strengthens the local muscles, and releases excessive tension in the piriformis muscle.
Does Science Recommend Yoga for Sciatica Relief?
Yes, absolutely so. There are thousands of clinical trials and research articles to support the use of yoga therapy for lower back conditions. In modern medicine, systematic reviews are regarded as a higher level of evidence in support of any therapy. The systemic reviews are studies that pool the data from numerous studies. It then carries out statistical analysis and concludes the efficacy of any intervention.
Cramer et al. carried out one of the most well-planned systematic reviews and meta-analyses regarding the benefits of yoga for lower back pain. [7] In the study, they included data from several clinical trials with a total of 967 chronic low back pain patients. The study concluded that there is strong evidence in support of yoga treatment for back pain.
The review focused on all the causes of lower back pain and not just sciatica. However, did yoga work for patients diagnosed with herniated disc and resulting sciatica? In the random clinical trial, sixty participants were divided into two groups. Out of them, 62% had sciatica. At the end of the trial, those who did yoga along with conventional treatment had a much better score and reduced disability. Thus, the study concluded that yoga is a safe and effective way to overcome sciatica caused by a bulging disc. [8]
There are no conclusive studies, showing that yoga can have a positive effect in managing sciatica caused by piriformis syndrome. However, a very common treatment in these cases is stretching exercises of the buttocks, with external rotation. These exercises exactly target the piriformis and the other lateral rotator muscles below the glutes. Yoga has a great range of asanas that stretch these muscles in your body.
When teaching yoga to students with sciatica, make sure that the student is out of the acute pain phase. Also, check that they have been cleared by the physician or physiotherapist to practice yoga. Moreover, request the students to inform you about any advice related to general movement and exercise that has been given to them. This will help you decide which poses and stretches to do and which ones to avoid.
9 Yoga Poses for Sciatica Relief and Prevention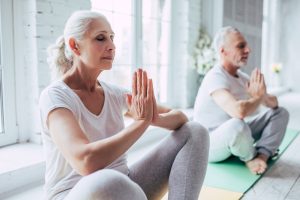
Misalignment of the lumbar spine exerts pressure on the sciatic nerve. Usually, this is caused by incorrect postural habits over a prolonged time. An incorrect or bad posture puts a lot of pressure on the spine. Too much sitting and slouching results in tight hip flexors, tight glutes, and tight hamstrings. Moreover, it also leads to a muscular imbalance between the abdominal muscles and the lower back muscles. Restoring a healthy and natural lumbar curve is essential, as this will reduce the pressure on the intervertebral discs.
Given below are 9 yoga poses that can help to release tension in the muscles that cause sciatica pain. These poses will also help to re-balance and strengthen the appropriate muscle groups in the body. Make sure to apply these postures within a balanced practice. You should also ask your students to inform you if they feel that a certain posture or exercise increases their pain during or after the practice. [9]
1. Dragon Pose (Yin Yoga)
Areas Affected: This pose works deeply on the hip area and the groins and stretches the hip flexors and quadriceps.
How To Do It: Begin by getting into the tabletop position, i.e., by getting down on all fours. Next, bring your right foot between your hands and press it gently on the floor. Make sure to check that the knee is right above the heel, and both the hands are placed on either side of the right foot.
Next, gently slide your left leg backward so that you feel a nice, good stretch on the left hip and the left thigh. Do not put pressure on the left knee, but raise it just a little. Keep your toes tucked in and hold the pose for 3 – 5 minutes.
You can rest your hands on blocks instead of placing them on the floor. You can also use an additional blanket to support your back knee and avoid any discomfort.
To come out of the pose, gently pull your back leg forward and get back into the tabletop position. Repeat the same with the other side.
Counter Pose: Child’s Pose (Shashankasana).
NOTE:
Use props to cushion the knees, and support the back if you have any pain in these areas or if there has been any prior injury.
In case you are trying any of the variations, be careful when you move from one pose to the next.
2. Sphinx Pose (Yin Yoga)
Areas Affected: This pose helps to stretch and open up the shoulders, the chest, and the abdominal muscles.
How To Do It: This pose is a variation of the Cobra Pose (Bhujangasana). Begin by lying down on your stomach with legs extended behind you. Place your hands above you and rest your forehead on the mat.
Next, take a slow, deep breath in, and slide your hands downwards until the elbows are placed under the shoulders. Then slowly lift your head, chest, and abdomen by using your forearms for support.
Keep breathing with awareness and feel the breathing rhythm at the front of your pelvis and in the abdomen. You will also feel a light compression in the lower back region.
Finally, breathe out slowly and gently bring your torso, neck, and head downwards and back to the initial position.
Counter Pose: Crocodile Pose (Makarasana)
NOTE:
Pregnant women should avoid this pose after the first trimester.
People with recent abdominal surgery and injury in their back, arms, or shoulders should avoid this pose. Follow your doctor’s advice if it’s been a while since you have had your surgery or injury.
3. Matsyasana | Fish Pose
Areas Affected: This pose is great for aligning the spine and releasing stress from the neck muscles, the shoulders, and a tired back. It provides a good stretch to the deep hip flexors and the muscles between the ribs. It also stretches and stimulates the muscles and organs in the abdominal region and the throat area.
How To Do It: Begin by lying down on the mat with your hands placed on the side and legs kept straight.
Next, take a nice deep breath in, pull your legs up, bend the knees, and slowly lift your pelvis. As you lift the pelvis, slide your hands underneath and place them below the buttocks with the palms facing downwards. Bring your forearms and your shoulders closer to your body and tuck them near the torso.
Take another breath in, and slowly raise your upper torso and neck away from the floor. As you do this, gently press the shoulder blades and your head a little downwards. Avoid putting any pressure on the head or the shoulders. You will feel a backward arch form as you do this pose.
You can keep the knees straight or bend them slightly. Hold the pose for around 20 seconds, and then slowly breathe out and lower your torso and head. Get back to the initial position.
NOTE:
Avoid this pose if you have had any neck injury.
People with high blood pressure or cardiac problems should also avoid this pose.
4. Ardha Setu Bandhasana | Half Bridge Pose
Areas Affected: This pose keeps the spine supple and flexible. It strengthens the glutes and lumbar muscles, stretches the intercostal muscles, and releases tension and pain in the back region. It also rejuvenates the legs, buttocks, and tired back muscles.
How To Do It: Begin by lying down on your back. Next, bend your knees and bring your feet close to your hips.
Keep the feet hip-width apart and press them firmly on the floor. Place your hands by your side with your palms facing downwards.
Slowly, take a breath in and push your hands onto the floor and gently lift your hips upwards.
With your hands, try and reach the ankles as you bring the chest closer to the chin. Continue lifting the pelvis upwards, and keep breathing gently and in an even manner.
Counter Pose: Corpse Pose (Shavasana)
5. Bhujangasana | Classical Cobra Pose
Areas Affected: This is a highly recommended pose for keeping your back healthy and strong. It tones the back muscles, adjusts small displacements in the vertebrae, and helps to keeps your posture correct.
How To Do It: Begin by lying down on your stomach on the mat. Place your hands on your side and keep your legs together. Press your feet, your thighs, and your pubis firmly on the floor.
Take a nice, deep breath in and lift your head, chest, and abdomen off the floor by using your palms.
Gaze diagonally up, lift your palms off the mat and hold the pose for a count of 4-5 gentle, slow breaths.
Counter Pose: Crocodile Pose (Makarasana)
NOTE:
Avoid this pose during pregnancy and if you’ve had an abdomen surgery or any recent injury in your back, arms, and shoulders.
If you feel any strain or pain in your lower back, gently lower yourself down and get into the initial position. Rest for a while and let the sensations subside.
6. Sarvangasana | Shoulderstand
Areas Affected: The word ‘sarva’ means entire body. As such, this pose benefits the body’s overall functioning and tones the deep muscles of the torso.
How To Do It: Begin by lying down on your back and keep your hands on the side. Next, slowly bend your knees, and with a single movement, lift your body upwards from the hip region.
Your legs, buttocks, and hips should be above ground and the entire weight placed upon your shoulders and upper arms. Use your hand to support your back and avoid putting any stress on the neck and the head.
Straighten your legs and spine, and press the elbows onto the ground. Bring the feet above your face. Keep breathing deeply, and hold the pose for at least 30 seconds.
To release the pose, slowly lower your knees and bring them towards your forehead. Place your hands on the floor, palms facing downwards. Slowly bring down the body and legs, and keep the spine aligned as you do this.
Counter Pose: Corpse Pose (Shavasana)
NOTE:
People with high blood pressure or with an enlarged thyroid, spleen, or liver should avoid this pose.
If you have any injury in the head, neck, shoulders, or hips, then avoid this pose.
7. Eye of the Needle Pose (Yin Yoga)
Areas Affected: This pose works as a hip opener and gives a good stretch to the glutes and the deep external rotators.
How To Do It: Begin by lying down on your back, knees bent, and your feet pushed firmly against the floor. Slowly inhale and bring your left knee up towards your chest.
Next, cross the left ankle over the body and gently place it across your right thigh (flex the foot. Keep the left knee away from your chest.
After this, lift your right foot and as you do this, take your left hand and put it through your bent leg (the eye of the needle) and touch the other hand. You should be able to touch both your hands behind the right thigh.
Use your hands to bring your right thigh towards your chest. Hold the pose for 30-60 seconds.
Counter Pose: Corpse Pose (Shavasana)
NOTE:
Avoid this pose after your first trimester.
Avoid if there is any pain sensation in your knees.
You can use a towel or a strap if you find it too difficult to reach your thigh.
8. Shoelace Pose (Yin Yoga)
Areas Affected: This pose is a deep hip opener. It stretches the glutes and the deep external rotators.
How To Do It: Begin by sitting on your heels with knees placed close together. Shift your weight to the right and sit on your right hip.
Next, cross your left leg over your right, placing your left heel next to your right hip. Your left knee should be on top of your right knee.
Gently fold forward from the hips. Keep your palms flat on the floor, and hold the pose for around 3 minutes.
To come out of this pose, use your palms to give a slight backward push, straighten your back and gently uncross your legs. Take a short pause and then repeat it with the other leg.
9. Counter Pose: Child’s Pose (Shashankasana)
NOTE:
Avoid this pose if you have knee pain or knee injury.
Women are advised to avoid this pose from the second trimester of pregnancy onwards.
Paschimottanasana | Seated Forward Bend
Areas Affected: It stretches the entire back body, especially the lumbar and thoracic spine, the glutes, and the hamstrings.
How To Do It: Get into a seated position with your legs straight in front of you, hip-width apart. Press your heels and sitting bones gently on the floor. Take a deep breath in, and raise your hands above you.
Bend forward as you exhale, creating the movement from your hip joint. Try to reach the toes with your hand. If you cannot reach the toes, try to touch the ankle, the shins, or the knees. As you do this, bend your elbows slightly and gently rest them on the floor.
To get out of this pose, gently breathe in and slowly roll up.
NOTE:
If you have a slipped disc problem, then avoid this pose.
Conclusion:
It’s been scientifically proven that yoga can be used for treating sciatica and other forms of back pain. All the yoga poses mentioned in this article help to bring the muscles of the body back into a healthy balance. Hence, it is recommended that people with LBP start including yoga in their daily life along with the standard medical treatment.
Statistically, the chances of sciatica nerve pain occurring are pretty high for young people as well as the elderly. While not every cause may be within our control, it helps if we can maintain some healthy habits. And yoga is one of the most beneficial ways to take good care of our physical body in a low-impact, safe way.
Original article posted on arhantayoga.org